


Car Shock Absorber Struts Replacement 2025 Step by Step
2025-10-15
Introduction
If your car experiences severe bumps when passing over small potholes, the issue might lie with the shock absorbers.
This blog post will guide you through the process of replacing shock absorbers on your own, providing a detailed list of tools, consumables, step-by-step operations, and key safety precautions.
By following these instructions, you can resolve the bumpy ride problem and gain practical auto repair skills.
Tools You Need to Prepare
- Large ratchet wrench set
- Open-end wrench
- Torque wrench
- Electric wrench
- Screwdriver
- Jack
- Safety stands
- Spring compressor tool
Consumable Materials
- Medium-strength thread locker
- Brand-new shock absorber
- Spring rubber bushing
Replacement Process (Please check the precautions in Section 4 first before starting)
-
Remove the Tire
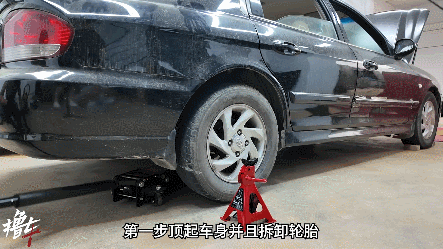
- Use a jack to lift the part of the vehicle where the shock absorber needs replacement.
- Support the vehicle body with safety stands.
- Use an electric wrench with a socket to remove the tire.
- Place the removed tire under the vehicle body as an additional safety precaution.
-
Remove the Old Strut
- First, remove the bolt that connects the bottom of the shock absorber to the steering knuckle. Use a small jack to lift the steering knuckle—this prevents the steering knuckle from bouncing down after loosening the bolt (though this bouncing may not actually occur).
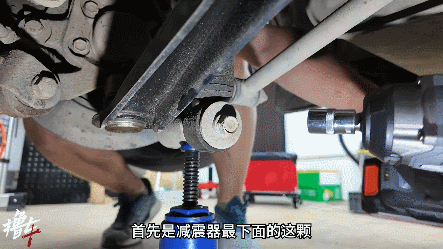
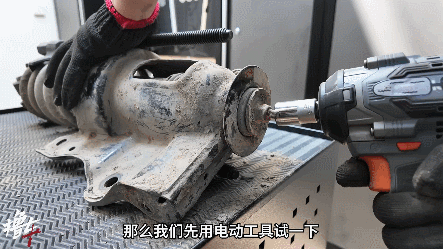
- Use an electric wrench to remove the aforementioned bolt.
- Next, remove the 4 fixing bolts on the upper shock absorber mount (located at the top of the shock absorber).
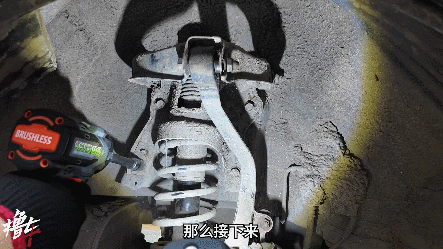

- Go back to the bottom and tap the connection between the shock absorber and the steering knuckle to separate them.
- Return to the top and remove the bolts that connect the upper shock absorber mount to the upper control arm (one on each side), using a ratchet wrench with a socket.
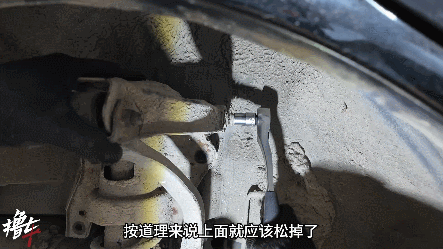
- Finally, loosen (but do not fully remove) the through-bolt that connects the steering knuckle to the upper control arm, and lift it slightly to create space. This allows you to take out the entire shock absorber (including its upper mount) from the suspension.

-
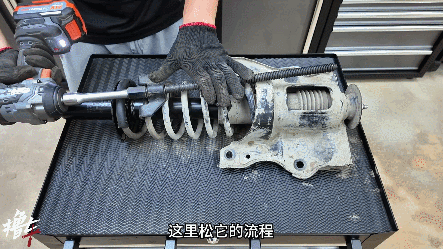
Remove the Old Shock Absorber
- Use the spring compressor tool: attach its two claws to the upper and lower sides of the shock absorber spring. Use an extension rod to slightly tighten one claw, then repeat the same operation on the other claw. Keep the two claws in opposite positions as much as possible.
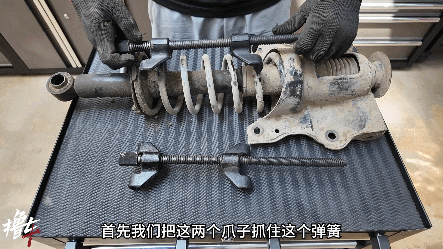
- Use a wrench or electric wrench to gradually tighten one claw (only a little at a time), then tighten the other claw to match the position of the first one. Repeat this process until the old shock absorber inside becomes loose.

- Remove the fixing bolt at the top of the shock absorber. If the bolt is severely rusted and cannot be removed (as in this case), use an angle grinder to cut it off (since it will be replaced anyway).
- Pull out the old shock absorber from the middle.

-
Install the New Shock Absorber
- Take the buffer rubber bushing removed from the old shock absorber and install it on the new shock absorber.
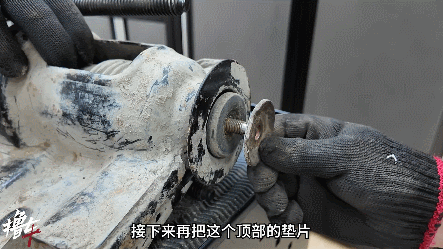
- Install a new spring cushion (the old one may have broken during removal).
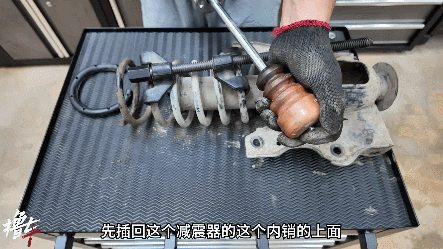
- Insert the new shock absorber back into the spring, aligning it with the spring positioning pin.
- Install the top fixing nut: first, put on the washer, then screw on the nut. Use an adjustable wrench to hold the middle pin in place, and another open-end wrench to tighten the nut. Since this is an anti-slip nut, a medium strength thread locker is not needed here.
- Loosen the spring compressor tool: follow the same process as when installing it—loosen one side a little, then the other side, repeating until the tool can be removed from the spring. The new shock assembly is now installed back into the spring and mount.
-
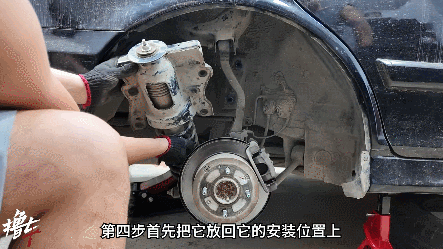
Reinstall the Shock Absorber onto the Vehicle
- Put the shock absorber back into its original installation position. There are two positioning pins on the vehicle body to fix the upper shock absorber mount.
- First, install all the bolts on the upper mount—do not forget to apply medium-strength thread locker to the bolt threads (this prevents bolts from loosening due to vibration). Only hand-tighten the bolts for now (do not fully tighten them).
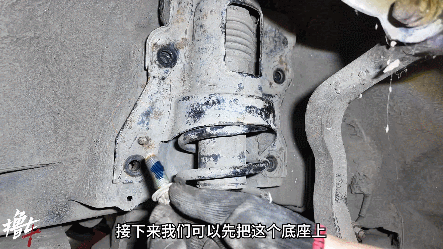
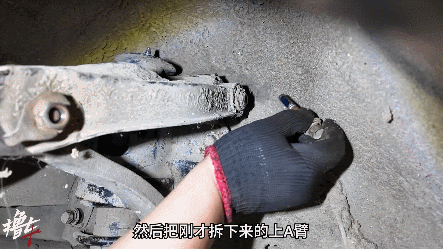
- Install the connecting bolts between the upper control arm and the upper shock absorber mount, also applying medium-strength thread locker to the threads. Again, only hand tighten the bolts.
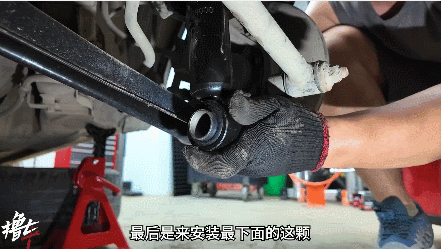
- For the bottom part: Fit the rubber bushing at the bottom of the shock absorber into the installation position on the steering knuckle, then use the original bolt and screw it in by pressing.
- Tighten all bolts in two steps using a torque wrench:
- First, tighten the five bolts on the upper and lower shock absorber mounts. These bolts are not affected by changes in suspension geometry, so you can tighten them directly according to the torque specified in the repair manual.
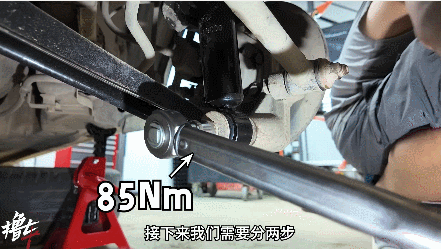
- Next, tighten the three bolts on the upper control arm: use a jack to lift the steering knuckle on this side, then slowly lower the jack to return the vehicle to its normal horizontal state (as it would be with the tire installed). Then tighten these bolts according to the torque specified in the repair manual (e.g., 85Nm, 110Nm, 75Nm—refer to your vehicle’s specific manual).
- First, tighten the five bolts on the upper and lower shock absorber mounts. These bolts are not affected by changes in suspension geometry, so you can tighten them directly according to the torque specified in the repair manual.
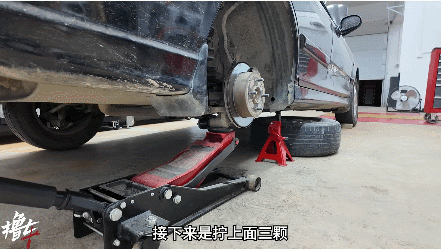
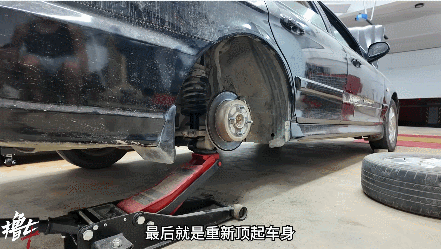
- Finally, lift the vehicle again, reinstall the tire, and use a torque wrench to tighten each tire bolt. The replacement of the new shock absorber is now complete.
Precautions
- After lifting the vehicle with a jack, always use safety stands to bear the vehicle’s weight. Jacks cannot support the vehicle for a long time—this is a critical safety measure.
- Before installing bolts, always apply medium-strength thread locker to the threads to effectively prevent bolts from loosening due to vibration.
Hope you have a great time repairing your car! — Reko Auto Parts